
When we first bought our house, we knew that we had leaks in the basement, we just didn’t know quite how bad they were. There was a sump pump in place that helped ease our minds and we were able to get most of the water out with it. However, it seemed there was always at least a damp floor and occasionally puddles. When it rained, it sounded like someone had turned on a faucet!
We’ve debated over the years about waterproofing the basement it to make it into a more livable space. Up to this point, we’ve always used it for storage and everything we stored down there, comes out smelling musty, like a basement (imagine that, right?). It seemed impossible to fix though. There were so many issues. There were cracks in the walls where the water was pouring in and seepage.
When baby #7 was getting close to being born, my husband decided to have a contractor out to give us an estimate on what it would cost us to fix it. He had debated about doing it himself, but wasn’t sure he wanted to take on such a large project! We had the contractor out and it took a while of mulling it over to decide if he really wanted to have someone else fix it. He knows how to do many home projects, but this one, we’d have to rent machinery for, plus, he’d have to take time off of work to get it done, all with a new baby coming any moment.
After a couple of weeks of hard thinking, we finally decided to hire the job done. While my husband still thinks that he could have done it himself, he’s glad that he didn’t have to!
How to Waterproof a Basement
This is where I share our experience of what the contractor did to waterproof our basement. It’s actually an interesting process (if you like home renovations anyway!). Since I was just a bystander (now with a nursing infant), I may not get all details 100% accurate. I’m definitely close. You’ll get the general idea.
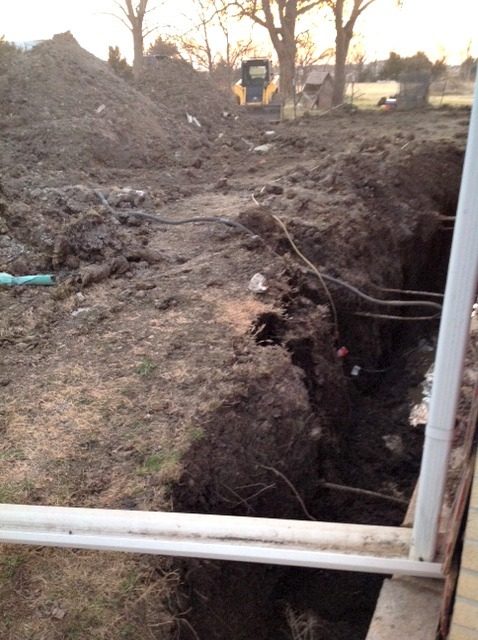
Most of the water that was pouring in was from cracks in the wall on the south side of the house. They began by digging up that whole side of the house with an excavator. There were many pipes and things coming into the house that they had to dig around. In fact, they cut right through one of our water lines and had to fix it before they could move on.
This post contains affiliate links

You can see the piles of dirt in the back yard…..
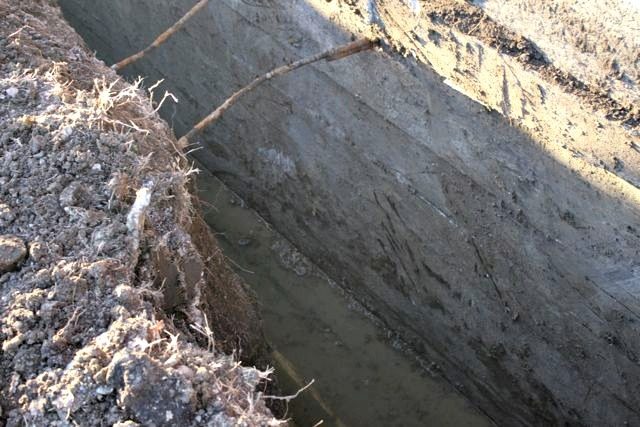
After they dug that wall up, they had to clean the wall. They had scraped and sprayed it off, and then used a sump pump to clean up the water they were putting back into the hole. The evening after they had just done this, we were sitting in our living room when we heard a large C R A S H. Part of the wall had caved in, rattling the ladder that was still in the hole. I had quite the adrenaline rush from that loud noise, but overall, it wasn’t much of a setback. They recovered from it quickly!
Here’s a picture of the cleaned up, nonmuddy wall.
After the wall was clean (and dry), they sprayed a layer of black tar on it, for waterproofing. The whole house smelled that day. It was funny though, it kind of smelled like chocolate. While in the house, you get used to the smell, but if you leave and come back in for a bit, you wonder who is baking something. I never realized tar and chocolate smelled so similar. 🙂
You can see the black tar here (and the person applying it at the end of the picture)

After the layer of tar, they put in a drain at the bottom of the hole. They call this a tile, but basically it’s a permeable pipe that allows the water to go in and then moves the water to a sump pump. The sump pump is installed at one end of the house and all water that is collected into that tile ends up getting pumped out and into a field that drains to the ditch.
After the drain and sump pump are installed, they place a dimple board over the whole wall. This helps any water that comes in contact with the wall to drip down to the drain and not enter into the wall. Finally, a layer of gravel goes on top of the drain. You’d be amazed at just how much gravel goes in (nearly to the top!). The gravel helps the water move down towards the tile. On top of the gravel goes the dirt.

In addition, the dirt around the house is piled up higher against the house and angled downward, so that it will drain away from the house. French drains were installed so that the water will move away from the house as well. Last, but certainly not least, seamless guttering was installed, too so that the french drains would be put to good use!
Since that time, we’ve had no water leaking into the walls of the basement! We did continue to have some seepage, but we’re now addressing that issue. I’ll tell you all about that one next!
That is phase one of our basement waterproofing project in a nutshell.
Leave a Reply